Kalliope Kids: Sea Life Costumes Part 3

Free Willy! I lived in the Pacific Northwest. I lived in San Diego near Sea World. And yet my first thought when I think of orcas is Free Willy. What can I say, but that I was in high school in the nineties.

This costume was actually made for a school project for K-Dogg. His grade all did school reports on animals, and the week culminated in an animal parade where they all wore their costumes and paraded around the elementary school. Most of them made their own costumes out of paper bags, but what can I say, I like to overdo things! (Me? Never!) Plus, it gave us a costume for sushi day. Multipurpose!

20130426-082659.jpgI started with a men’s extra-large sweatshirt (here’s where the upcycling comes in–check out thrift stores. You should be able to find one. Just make sure it has a hood.) I then removed the front pocket–save it for later!

20130426-082910.jpg

20130426-083431.jpgTo make the fins, I flipped the sweatshirt inside-out, and rounded the ends of the sleeves. I then just sewed them together–K-Dogg couldn’t actually use his hands, but he didn’t need them to parade around anyway. And he could still grab things; he just lacked fine motor skills through the sleeves.

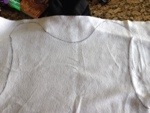
Next, I laid a large piece of white felt over the front of the sweatshirt (right side out again!). I tried to smooth it down over top, so I could see the lines of the sweatshirt underneath. I then drew along the armpit seams, around the neck, and the bottom of the sweatshirt. I extended the lines around the tops of the shoulder, so the white would wrap to the back, and extended the sides as well.

20130426-083138.jpg

20130426-083146.jpgI then cut the felt out, and used a basting spray to stick it to the sweatshirt, and sewed around the edges. You could just use a spray adhesive to bond it together (I don’t recommend a heat ‘n bond, though, since felt will melt), but I wanted it to be a little more sturdy.

20130426-083810.jpgNow for the mouth–I cut a bunch of teeth out of the white felt. I also cut a half circle out of the white felt to form the bottom of the mouth–I made the flat edge long enough to go from shoulder to shoulder, and I made it high enough to extend a little above K-Dogg’s face. (Confused? Me too. But it really was just a judgment call as to how big it should be.)

20130426-084057.jpgI sewed half of the teeth to the round part of the semicircle of felt, then sewed the flat edge along the top of the sweatshirt (under the hood). The edge is curved, and the felt is straight, so it helps prop that bottom part of the mouth out and away from the face.

20130426-084247.jpg

For the other half of the teeth, I just sewed them along the top edge of the hood–creating a mouth that K-Dogg could look out of!

20130426-084404.jpg

Now, back to the felt. I cut two bean-shaped pieces of white felt for the eyes, and sewed one to each side of the hood.

20130426-084528.jpg

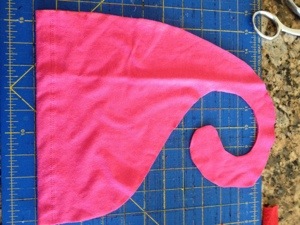
And finally, back to that pocket that I ripped off the front. I folded it in half, and used it to make the dorsal fin for the whale. I just cut a triangle out of it, sewed up the sides and stuffed it. I then folded under the raw edge and pinned it to the middle of the back of the sweatshirt, and used a zig-zag stitch to sew around the edge.

20130426-084712.jpg

20130426-084723.jpg

20130426-084732.jpg

And….voila! Killer K-Dogg!

20130426-084821.jpg

20130426-084829.jpg

Kalliope Kids: Sea Life Costumes Part 2

20130419-173016.jpgBug decided, in true Bug fashion, that she wanted to be a sea horse for the kids day at our sushi place. But a pink sea horse. With purple polka dots. (The conversation we had about it was awfully reminiscent of the one about the unicorn cape–sure I can do that…no problem…)

I started out with two shirts, one her size and one much, much bigger. I did it this way so the color and fabric would match, and I bought the shirts for a couple bucks a piece, so figured it would be about as cheap as just finding fabric. The big shirt I cut up for the various parts that I need to add.

20130419-173615.jpgMy first cut was to create a sea horse tail–I cut through both layers of the shirt to create a tail with a swirled end, then stitched the sides together (right sides together), flipped it right side out, and stuffed with stuffing. I then sewed the tail to the back of the main shirt along the top edge, trying to stitch along the sewed lines of the shirt.

20130419-173831.jpg

20130419-175333.jpgMy next cut was to make a back fin. (I don’t think sea horses actually have fins, but they have a ridged back and this seemed to add that effect.). Again I cut out a shape out of two layers of shirt, and cut the same out of two layers of felt. I then stitched the fin lines through all layers, and trimmed up the edges (sewing through the different types of fabric shifted everything a bit). I then sewed this fin to the center of the back of the shirt. Oh, yeah, I should probably note–I really just free handed the patterns. There are no templates. There is no rhyme or reason. There is just me and my scissors…but I digress.

The final step for the shirt was to add the purple polka dots. For this I just used my circle punch for my sizzix, and cut out various sized circles from a purple and pink batik fabric. I got lazy at this point, though, and just used a spray adhesive to stick them on–we lost a few, but much less than I expected to. If we needed this costume for anything more than a lunch, I would have considered sewing them on.

20130419-175709.jpg

20130419-175732.jpg

Now, on to the hat.

20130419-175833.jpgI started off by raiding the kids dress up box, and found a knight helmet that I figured would work. I hot glued some more fabric scraps (from the t shirt) to it–it took a couple cuts of fabric.

20130419-175945.jpgI also rolled a toilet paper tube in a matching felt (I was out of fabric by this point), and glued this ‘nose’ to the front of the helmet, using a lip of felt off the end of the TP tube.

20130419-180110.jpg. I also cut two more fins (like ears) and hot glued them, and a couple googly eyes, to the top of the helmet and the hat was done!

20130419-180238.jpg

For the final part, I created a skirt that was supposed to represent the ocean in which my little sea horse lived. I made a long skirt from blue fabric, sewing a large tube together. I added a few layers of tulle to the top of this, doing the same thing–just sewing two ends of a large piece of fabric together. I then folded the top of the layers over, creating a narrow band, sewing all but a small opening and inserted a piece of elastic. (Sorry, I have no pictures of this–it was a really quick sew job). I then cut out seaweed pieces and used spray adhesive to glue them to the lays of tulle. I tried to glue them on different levels, so there was some depth to the ‘sea’.

20130419-180652.jpg

All in all, I think it turned out pretty cute for something I had no idea what to do with!

20130419-180749.jpg

Kalliope Kids: Sea Life Costumes Part 1

Has it really been two months since I posted anything? I knew I was slacking, but not quite THIS bad! But have no fear, I have been crafting out the wazoo; I now need to play catch-up in my posting of all I have done!

Last weekend we went to the Kids Day at our local sushi joint. They do these once every few months, and each time has a theme for the kids to dress up. They then get to make their own sushi rolls, do crafts, get airbrush tattoos, and in general have a fantastic time. The theme this time was ‘Under the Sea’.

20130419-101046.jpgI decided that Meeska would be a jellyfish. I didn’t expect him to actually wear this hat, but he is the only one that has a sombrero, so by default he got this costume!

20130419-101711.jpgThe only problem I was facing with this costume is that Meeska’s sombrero was expensive, and I needed to keep it intact. So, no glue on the sombrero itself…

20130419-101918.jpgTo compensate for this, I started by cutting two circles of fabric that would cover the sombrero top and wrap around to the underside almost to the head-hole. I then stitched the two layers together around the outer edge, leaving a small opening (I didn’t bother to stitch the layers wrong sides together and flip them–the unfinished edge can just be tucked in later. And yes, I did mean wrong sides–one of my layers is sheer, and I wanted the under layer to show through it, so the wrong side ends up on the outside!)

20130419-102456.jpg

20130419-102522.jpgThe next step was to wrap the top of the sombrero with batting. I cut strips of batting and rolled it around the top, enough to make a roughly oval shape and cover the hard parts of the sombrero. I then laid the sombrero and stuffing top down on the circles of fabric, and fed a ribbon through the outer edge of the circles.

20130419-102736.jpgThen just pull the ribbon tight, and tie it off, and tuck the unfinished edges under!

20130419-102841.jpg

The final step is to create the tentacles and decorate the jellyfish. I just used my trusty hot glue gun for this, starting with running a wide ribbon around the outside of the jellyfish ‘head’. I then created large curled tentacles using wired ribbon–I pulled the wire from one side of the ribbon, which lets it curl up on itself (make sure you secure an end before though, or you will just pull the wire right out!). I also added strips of smaller ribbons of varying colors.

20130419-103151.jpg

Once all the glue has dried, it became a super easy costume – just add matching clothes! And to rescue the sombrero, all I have to do is untie the ribbon on the inside, and the whole thing will come off.

The only other thing I thought about doing for this jellyfish was to add a string of battery power lights under the circles of fabric–giving it that phosphorescence. I thought it would be cool, but since this costume was for daytime, it seemed pointless. However, I can always go back and add them if we use this one for a nighttime (like Halloween…) costume! I think for that all I need to do is wrap the lights around the stuffing, leaving the battery end near the hat hole so they can be turned on and off!